Preparing an image for conversion to a Decal
I will be using PaintShop Pro 6.02 by Jasc Software for this part of the tutorial and I will be converting my ‘hornetweb.gif’ image into a bitmap ready for conversion into a decal. This image is the same as appears as my Logo on the members page (except it has a grey background instead of black). Obviously all the processes explained below may not be needed for your image and are shown below for illustration.
Quick reference :-
1. Loading and converting your image to Bitmap format
2. Resizing/cropping/reducing colours for your image
3. Setting/converting the Transparency Colour
Remember you have to meet the following criteria for your image :-
- The image you are creating has to be a maximum of 256 colours
- The total image size of the BMP file cannot be larger than 12288 bytes otherwise the created ‘pldecal.wad’ file will be too big.
- The dimensions of the image must be a multiple of 16. For example, an image of 80 x 96 pixels is acceptable as both dimensions (width and height) are divisible by 16.
- True blue is the transparency colour so anything that is true blue (RGB 0,0,255) in your image will appear transparent.
1. Loading and converting your image to Bitmap format
Run Paintshop Pro and load the image you wish to convert. Your image will appear in Paint Shop
Pro either in full screen (maximised) or in a window. (see below)
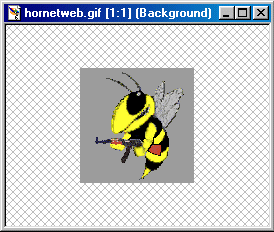 |
My image is saved as a gif file so I need to convert it into a bitmap file first. To do this select ‘File - Save As’ and save the image as a bitmap file called ‘pldecal’.
(see below)
 |
2. Resizing/cropping/reducing colours for your image
In the bottom right hand corner of the screen there will be details about your image (if your
images window is selected). (see below)
 |
As you can see my image is 114x115 pixels x 256 colours and is 14kb in size.
If your image is of greater colour depth than mine then you will need to reduce your images colours down to 256. This is done very easily.
Make sure your images window is selected then select the ‘Colors’ Menu then ‘Decrease Color Depth - 256 Colors (8 bit)’.
For my image to comply with the criteria that I listed at the start I need to get the file size down below 12kb (roughly) and correct the dimensions to multiples of 16.
The easiest way to reduce the file size and the image size is to ‘resize’ and/or ‘crop’ the image. I will reduce the image size down from 114x115 to 80x96 as that should reduce the file size down enough to meet the 12kb criteria. First I will resize the image so the height is 96 pixels (6x16).
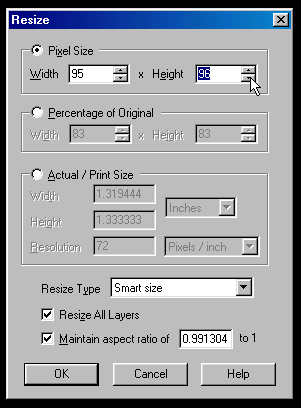
Select the ‘Image’ menu and then ‘Resize’ and the Resize dialog box will appear.
Make sure the ‘Maintain aspect ratio’ box is ticked and then use the ‘Pixel Size’ option to reduce the height to 96 pixels. Click OK to complete the operation. (see below)
 |
As there is some free space to the left and right side of the ‘hornet’ picture I will crop the image so the width is 80 (5x16).
It will probably be easier if you zoom in or magify the image first so its easier to see. Select the magnifing glass from the left hand toolbar and zoom in a couple of times (x3) then select the Crop tool. (see below)
 |
The image needs to be cropped to 80x96 pixels so use the crop tool to drag a box on the image. It does not need to be exactly in the right place or the right size to start off with as the box can be moved and resized later. (see below)
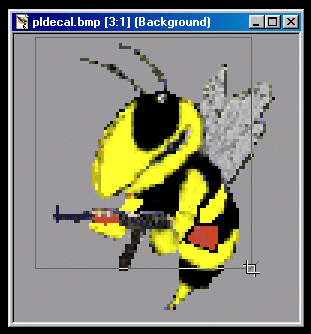 |
Resize the box so it is 80x96 by using the mouse on the edges of the box. Look in the bottom left corner of the screen to see the size of the selected crop area. (see below)
 |
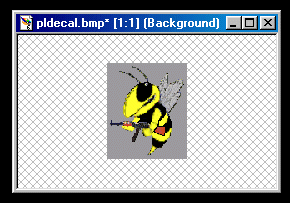
You can move the crop area with the mouse when you left click inside the crop area. Centre the crop area around the ‘hornet’ image and then select the ‘Image’ menu and then select ‘crop’. Now I have the correct size image size, 80x96 or (5x16)x(6x16) and the reduced image size has also reduced the file size down to 8.5kb, well within the criteria of 12kb. See below for the final cropped and resized image.
 |
3. Setting/converting the Transparency Colour
My ‘hornet’ pldecal.bmp is now ready to use if I do not want any transparency effect on it i.e. the spray will appear in game exactly as the image above.
However I do not want the grey background surrounding my ‘hornet’ image to appear in the game so I need to convert the grey into the transparency colour. The tranparency colour is
true blue (RGB 0,0,255) for WAD files and it has to be set to the palette index of 255.
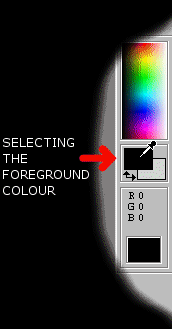
The first thing to do is to change the current grey background colour to the palette index 255 colour. To do this you first need to select the palette index 255 colour for use with the ‘Flood Fill’ tool.
Move your mouse over the ‘Foreground Colour’ icon on the right hand side of the screen. Your cursor will change to the ‘Eye Dropper’ colour selection cursor, left click to display the palette (see below)
 |
 |
Now we need to replace the grey background with the index 255 colour we just selected. To do this we need to ‘Flood Fill’ the existing grey background with the new colour (which happens to be a slightly lighter grey).
Select the ‘Flood Fill’ tool from the toolbar on the left (see below)
 |
The ‘Tools Options’ dialog box should now appear for the ‘Flood Fill’ tool. Make sure the settings match the example dialog box shown below (the ‘Tolerance’ may be different for you).
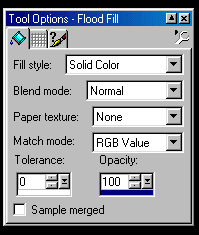
Left Click the mouse on the grey background around the ‘hornet’ picture to change the background colour to the selected index 255 colour. See the ‘Before’ and ‘After’ example pictures below.
Before After
(old colour) (index 255)

Now we need to change the palette index 255 colour to true blue (RGB 0,0,255) in order for the transparency effect to work. To do this select ‘Colors’ from the Main Menu and then ‘Edit Palette’. The ‘Edit Palette’ dialog box will now appear.
Double click the palette colour 255, its the last box as before (bottom right hand corner) and the ‘Color’ selection dialog box will appear. (see below)

Now we need to select true blue which is RGB 0,0,255. True blue is one of the ‘Basic Colors’ as shown in the top left of the dialog box. Left click the ‘Basic Color’ true blue as shown below.

The colour will now be changed to true blue. Click OK to see the final effect. (see below)
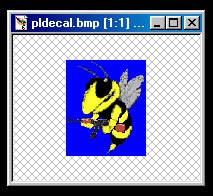
Thats it! Save the file now and you are ready to convert the bitmap into a decal for Counter-Strike. Use the ‘Back’ button to return to the main part of the tutorial to find out how to create the decal.
This Tutorial is Copyright of Hornet 2000